Desert Eagle Headshot Guide for Free Fire
Landing headshots with the Desert Eagle can feel challenging, especially when your opponent keeps moving. This guide explains Mr Weka's suggested settings and three aiming exercises for stationary targets, opponents moving straight and opponents moving sideways.
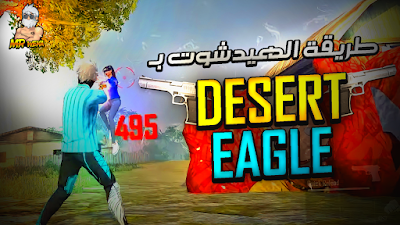
What Should You Practice First?
The original method focuses on two things: a comfortable setup and an aiming motion that matches the opponent's movement.
Your setup includes sensitivity, fire button size and button placement. These should let you tap and drag consistently without stretching your finger or running out of space.
The second part is learning where to begin with the crosshair and how to move your finger while firing. Practice against stationary targets first, then add different kinds of movement.
Suggested Desert Eagle Sensitivity Settings
These are the example values supplied in Mr Weka's original guide. Save your current settings before testing them, and use only values supported by your game.
| Setting | Suggested Value |
|---|---|
| General | 100 |
| Red Dot | 81 |
| 2X Scope | 86 |
| 4X Scope | 91 |
| Sniper Scope | 40 |
| Fire Button Size | 48 |
This is a complete example profile, rather than a claim that every sensitivity option directly controls Desert Eagle shots. Test the relevant aiming behavior and change one value at a time.
Three Desert Eagle Aiming Exercises
Each exercise involves the crosshair near the center of the screen and your finger movement on the fire control. The button itself stays in place while your finger performs the drag.
1. Against a Stationary Opponent
Begin with the crosshair around the opponent's center or near the body. The described motion is a small downward drag followed by an upward movement toward the head while firing.
Repeat the sequence slowly against a stationary training target. Watch where the crosshair finishes and reduce the upward motion if it passes above the head.
2. Against an Opponent Moving Straight
For an opponent moving toward you or along a straight path in front of you, the original method suggests beginning near or slightly above the head, then moving downward before bringing the aim upward again.
Treat this starting position as part of the demonstrated exercise. If it makes you overshoot, begin lower and shorten the drag. Keep watching the target as its distance changes.
3. Against an Opponent Moving Sideways
The third exercise begins with the crosshair on the opposite side of the opponent's movement. For a target moving right, start to its left. For a target moving left, start to its right.
Drag in the direction the opponent is moving, then bring the aim upward. Follow a right-moving target to the right or a left-moving target to the left before completing the upward motion.
The original method also mentions beginning before the crosshair turns red. Focus on reproducing the demonstrated placement and timing rather than treating the color as proof that a shot will succeed.
These motions need practice. Target speed, distance and direction can change during the shot, so avoid repeating a large fixed flick regardless of what the opponent is doing.
Practical Tips for More Controlled Shots
Start by Separating Movement and Aiming
Practice the aiming motion while stationary so you can concentrate on the gesture. Once it feels controlled, add movement and learn to coordinate both actions.
In real fights, use cover and avoid remaining exposed while preparing the shot. A brief practice pause does not mean standing still throughout a match.
Avoid Staying in One Position Too Long
After taking a shot, reassess your position. Reposition or return to cover when needed instead of repeatedly aiming from the same exposed spot.
Choose Your Moment
A stationary or predictable target gives you a simpler opportunity to practice timing. Against an actively moving opponent, track the movement and use the appropriate exercise rather than rushing the same gesture.
Change One Thing at a Time
If shots repeatedly rise above the head, shorten the upward drag before changing several settings. If your aim stops short, make a small adjustment and compare the result.
Keep your sensitivity and button layout stable long enough to judge how they feel. Consistent practice makes it easier to identify which adjustment helped.
Watch the Desert Eagle Video Tutorial
Watch Mr Weka's Arabic demonstration to see the crosshair positions and finger movements described in this guide.